A new catcher's mitt straight out of the box feels like a brick. The leather is stiff, the pocket is flat, and trying to catch a fastball with it is an exercise in frustration. Breaking in a catcher's mitt properly takes patience, but the payoff is a glove that forms perfectly to your hand and makes receiving pitches feel effortless.
The key word there is properly. There are plenty of break-in shortcuts floating around the internet that will ruin your mitt faster than you can say "warranty void." Let me walk you through the methods that actually work without destroying your investment.
The Playing Catch Method (Best Overall)
This is the gold standard for breaking in any baseball glove, and it works especially well for catcher's mitts.
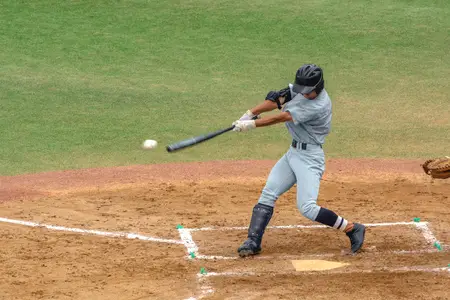
The idea is simple: use the mitt to catch baseballs. A lot of baseballs. Around 500 to 800 catches over the course of two to three weeks will get most mitts game-ready.
Start with light tosses from about 30 feet. Focus on catching the ball in the pocket area where you want the glove to form its natural shape. As the leather loosens up over the first few days, gradually increase the throwing distance and velocity until you are receiving pitches from full distance.
Between catching sessions, place a baseball in the pocket and wrap the mitt with two or three rubber bands.
This keeps the pocket formed while the leather fibers gradually adjust. Store it somewhere at room temperature, never in direct sunlight or in a hot car.
The playing catch method takes the longest but produces the best results because the mitt shapes itself around actual baseball impacts. Every other method is basically trying to simulate what this does naturally.
Glove Conditioner and Hand Forming
If you want to speed up the playing catch method, adding a quality glove conditioner to the process helps significantly.
Products like Nokona NLT Glove Conditioner ($8 to $12), Rawlings Glovolium ($6 to $9), and Mizuno Strong Oil ($10 to $14) are all solid choices.
Apply a thin layer of conditioner to the pocket, hinge points, and the area between the thumb and index finger. Do not soak the glove. A little goes a long way. Too much oil or conditioner will oversaturate the leather, making it heavy and floppy instead of supple and firm.
After applying conditioner, work the mitt with your hands for 10 to 15 minutes. Open and close it repeatedly. Push your fist into the pocket to shape it.
Bend the edges of the mitt inward along the natural fold lines. Then go catch some balls.
This combination of conditioner plus playing catch can cut your break-in time roughly in half, getting a mitt game-ready in about 7 to 10 days instead of two to three weeks.
The Hot Water Method (Use With Caution)
Some players and coaches swear by the hot water method, where you briefly apply hot (not boiling) water to the stiffest parts of the mitt.
This temporarily softens the leather fibers, allowing you to shape the glove more quickly.
Here is how to do it without ruining your mitt. Heat water to about 150 to 160 degrees Fahrenheit. Dip a clean cloth into the water, wring it out, and press it against the pocket and hinge areas for 30 seconds at a time. Immediately work the leather with your hands while it is warm and damp.
After shaping, apply a light coat of glove conditioner to replace the natural oils that the water removes.
Let the mitt dry naturally at room temperature for 24 hours with a ball in the pocket and rubber bands holding it closed.
A warning about this method: it works, but it shortens the overall lifespan of your mitt if overdone. Use hot water once or twice during the break-in process at most. Repeated applications will dry out the leather and cause it to crack prematurely.
The Mallet Method
Glove mallets designed specifically for breaking in baseball gloves run about $15 to $25 and are surprisingly effective.
The wooden mallet head simulates ball impacts without requiring a throwing partner.
Position the mitt on your hand or on a flat surface with the pocket facing up. Strike the pocket area firmly and repeatedly with the mallet for 5 to 10 minutes per session. Focus on the center of the pocket where you want the deepest break-in, then work outward along the hinge points.
The mallet method works best when combined with a small amount of glove conditioner. Apply conditioner first, then use the mallet to work it into the leather while simultaneously softening the fibers.
Follow up by placing a ball in the pocket and wrapping overnight.
This is a great option for players who want to break in their mitt at home while watching TV or just sitting around. It is not quite as effective as catching real pitches, but it is far better than doing nothing and hoping the glove softens on its own.
Methods You Should Absolutely Avoid
The microwave. Do not put your catcher's mitt in the microwave.
This sounds obvious, but people still do it. Microwaving leather can cause uneven heating that weakens the structural integrity of the mitt and may damage the internal padding and lacing.
Running it over with your car. Yes, this is a real thing people recommend online. Driving over your mitt with a car wheel flattens the padding, stretches the leather unevenly, and can break the lacing. It is a fast way to turn a $200 mitt into a pancake.
The oven or clothes dryer.
Excessive heat destroys leather. Temperatures above 170 degrees Fahrenheit start breaking down the chemical bonds in tanned leather. Your oven and dryer both exceed this threshold easily. The mitt might feel softer afterward, but the leather is now compromised and will deteriorate much faster.
Soaking it in water. Fully submerging a mitt in water is different from the controlled hot water method described above.
Soaking saturates the internal padding, warps the shape, and strips natural oils from the leather. It also creates conditions for mold growth if the mitt does not dry thoroughly.
Special Considerations for Catcher's Mitts
Catcher's mitts are thicker and more heavily padded than regular gloves, which is why they take longer to break in. The extra leather and padding in the pocket area need more time and effort to soften properly.
Focus your break-in efforts on three key areas. First, the pocket center where most pitches will land. Second, the hinge point between the thumb and the rest of the mitt, which controls how easily the glove opens and closes. Third, the area around the wrist closure, which affects overall fit and comfort.
Most new catcher's mitts need about 50 percent more break-in time than a standard fielding glove. If a fielding glove takes 300 catches to feel game-ready, expect your catcher's mitt to need 450 to 500 catches at minimum.
Maintaining Your Mitt After Break-In
Once your catcher's mitt is broken in, keep it in good condition with regular maintenance. Wipe it down with a dry cloth after each use to remove dirt and moisture. Apply a thin coat of glove conditioner every 4 to 6 weeks during the season. Store it with a ball in the pocket to maintain the shape.
A well-maintained catcher's mitt can last 3 to 5 seasons of regular play. Skip the maintenance and you will be shopping for a replacement much sooner than that.